Whenever anybody asks me this question, the answer is generally 'no'. I'd rather spend my time building something new than behind my computer slaving away using some CAD-software.
However, sometimes it can be time well-spent. As you may have
read, I've been designing aircraft for Lego Monster's Project Intrepid. What complicates the collaboration a bit is that currently we don't live in the same country any more, which means that even if I had the time to build dozens of aircraft models in a few months time, they'd be nowhere near their aircraft carrier. That makes making instructions worthwhile. The two aircraft types of which we intend to have the largest numbers are the Vought F4U Corsair and the Curtiss SB2C Helldiver
LDD or MLCad/LDrawTwo different types of CAD-software are commonly used by LEGO-fans. LEGO's own
LEGO Digital Designer and
LDraw using
Mike's LEGO CAD (written by Michael Lachmann) adding a graphical user interface (GUI) for editing the files. LDraw contains a library of parts (in .dat-files) and uses its own file format (.ldr files) to determine where the parts are placed, how they are oriented and what colour they have in your model. The LDraw parts library is maintained by volunteers and includes a truly staggering amount of different parts, both old and new. A separate program, called
LPub reads the .ldr files and turns them into instructions. LDD can also produce instructions, but its part library is far more limited even though with the release of the LEGO Universe game many new parts and colours have been added.
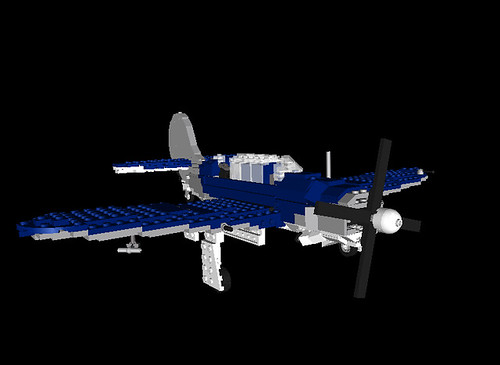
Both of my aircraft models use some rare (transparent clear tiles) and old parts (old-style finger hinges, for instance) that I suspect aren't available in LDD. Furthermore, when I dabbled with digital LEGO a few years ago I used MLCad for a bit, so I had some familiarity with the program. Below you see a screen-shot of MLCad displaying my Helldiver model.

Much has been written about LDraw and it is not my intention to write an extensive 'how-to' on making instructions. Instead I will share a few things that I ran into and the way I solved them on my way to making instructions.
Hacking LDraw files.
Making the instructions involves two main steps: making a digital version of the model in MLCad and then making images of each build step to go into the final instructions using LPub. MLCad offers the option of adding step commands between adding parts. Obviously, when making instructions for your model you need to think about how to work through it, layer by layer, for instance, in order to make sure that every part you add in each new step is supported by an existing structure and is visible in the instruction images. The STEP-commands are read by LPub when you start making the instruction booklet. Perhaps I am doing something wrong, but this doesn't seem to work all that well. No matter where I add the steps in MLcad (placing a STEP command in the LDraw file), when more parts are added later they can end up pretty much anywhere in the file. This makes a complete hash of things, with parts floating in mid-air because their supporting construction is to be built at a later step. Not good.

However, LDraw's files are set up such that you can actually read them. The file is a list of the various commands and the colour, coordinates and orientation of each part. LPub reads this from top to bottom when making the instructions. By swapping the order and adding step-commands yourself in a text editor, you can easily fix things. It takes some getting used to, but I found that once I got the hang of it, I could do it very quickly, by switching between the text editor in which I had the file open, MLCad to identify the parts, and LPub to show me how my actions affected the instructions. MLCad also allows you to add commands to rotate your model such that the part you're working on will be visible in the instructions, using a handy pop-up window that gives you a preview. These too can be manually adjusted in the file to optimise the result.
Further advantages of having human-readable files is that if you are having a bit of trouble lining two parts up in the graphical user interface, you can simply change the coordinates in the file. It also allows you to change colours quickly and I also manually edited the files to quickly mirror structures. For instance, if I have a right wing and want the matching left one, as a first step I would invert the sign of the appropriate coordinates in the file. You can see an example for the horizontal tailplanes of my Helldiver, with an image and the corresponding LDraw code underneath. The 3rd, 4th and 5th column are the x,y,z coordinates of the part (obviously the location of the origin of the part relative to the shape of the part is set in the .dat file for the individual part). If you compare the 5th column in both files, you'll see that I have inverted the sign (of the z-coordinate), thereby mirroring the part locations. Since the tailplane uses a few left/right wing plates, they had to be replaced by their mirror images (54383.dat and 54384.dat are the 3x6 wing plates). Some parts will need to be rotated (which can be easily done using the GUI) or replaced by their mirror images, which is simply a matter of changing a number. It might seem complicated, but it's much faster than 'building' the left wing from scratch, especially if you then have to manually edit that file again to place the step commands in their proper locations. Manually hacking the file, this one took me about five minutes.
Using sub-modelsOne important tip I can give you is to split your model into smaller sub-models.

Unless you have a massive screen to work on (I don't, I use a laptop), large models will be very small on your screen and will be awkward to work with. Using separate sub-assemblies also means you can use separate small .ldr files which are far easier to manage (and to edit) than big ones. When you finally reach the step of making the instructions, the sub-assemblies can also be done separately, much like LEGO themselves do for their instructions. Here is a sample page of my Helldiver showing one of the tail-planes as a sub-assembly.
Using LPub to make the actual instruction bookletLike MLCad, LPub also adds its own commands to the .ldr files of your model. This can be very handy, because you manually edit things yourself. Back before LPub4 came out this was the preferred way of doing things! Fortunately, in LPub4 you can edit things graphically. However, if you mess up or LPub crashes -which it does occasionally- you may end up with files that you can't run any more. So, here's a top tip: make a backup of all the .ldr files of your model in a separate folder/directory before you start serious work in LPub.
When you first run an .ldr file of your complete model through LPub, every single step including all the steps taken in sub-models get their own page. For my Corsair this lead to 159 pages and for the Helldiver the number was a whopping 207. Perhaps this works if you build with your computer handy, but if you want a print-out it obviously isn't practical. Lpub allows you to group multiple steps on the same page and even in multiple columns. You can put sub-assemblies in a separate little box (a 'call-out', as illustrated in my sample page). All of this makes the instructions a lot more compact, but also much easier to work with because it is easier to keep track of what sub-assembly you are building at any given time. Some people use LPub to export images and then use some other desktop publishing package to turn the whole thing into a booklet. Since I am making these primarily for private use, I felt sticking to LPub would be good enough and I am happy with the end result. LPub also allows you to add a bill of parts (a list of every part use in the model, with a picture), although with more than 600 parts in both of these models, the resulting picture becomes too big for a page. Fortunately you can scale the size of the part images LPub uses to make the thing smaller. I also added a front cover (an image file I made using a different program) to make the whole thing look more like a little booklet. Making the booklet for the Helldiver took about 6 hours, but I learned a lot in the process. After this experience, I turned to the Corsair and turned its instructions into a reasonably neat 27 page booklet in less than two hours.
Sharing the instructionsI only made these instructions so that Lego Monster and I can build multiple copies. However, I do feel that if I have them anyway, it would be nice to offer other people the opportunity to build the models as well. I am not doing this for a profit. If you are interested in your own free copy of either the Helldiver or the Corsair, you can download the .pdfs by clicking the images below (they should take you to mediafire.com, a file sharing website). A word of warning: these are not simple models and they require fairly large numbers of parts that aren't readily available in large numbers.


In the last few years I've heard of a
few cases where people took the trouble of making instructions, only to have other people start selling them claiming that 'you can't steal what is free'. In case there are misunderstandings about this, I'm releasing my instructions with a Creative Commons License Attribution-NonCommercial-NoDerives. In other words, you can distribute them freely, but they should be attributed to me, and they cannot be used for commercial purposes or modified.
Happy building!